Showing posts with label Mo's Digital Pencil Too. Show all posts

Friday, August 2, 2024

Penny Black Saturday Challenge ATG or Flowers


 Penny Black Saturday Challenge


August Inspiration

2024 Challenge


Anything Goes

or the optional theme-


'Flowers'


Don't you know I love me some Penny Black Mo Manning designed stamps!

I have  basically been stamping out of a box of stamping supplies while caring for family, but now that I am staying put where I am, I am slowly bringing my stamping goodies to a spare bedroom-soon to be my crafty room. I have had fun looking at all my other stamps. It's like Christmas!  Classic stamps never go out of style! 

This card is stamped on one panel and colored with copics. Very CAS as this is such an adorable image! I added a sweet Penny Black sentiment and it's finished!.


We are sponsored by:


 Prize winner gets a $20 voucher!            


I would love for you to hop over to our challenge blog 

and join in the fun.  The link is at the top of this page.


 ♥ Sue  


Pin It!

Saturday, October 1, 2016

Penny Black Saturday Challenge-Autumn or Fall Colors


Autumn or Fall Colors


Don't we all love Mo Manning/Penny Black Stamps?   I used a cling stamp named Gift of Love (40-178) designed by Mo on this card.  I really love this  stamp -- it could actually be used for fall and winter themes!  I colored the image and then added her to a digital stamp background (Autumn Entrance) that I just got from Mo Manning's digital site. You can find it HERE. I think these two are a perfect combo! Did you know Mo has specials on her digi's every day or so? Worth checking it out!

I had to print the digital background rather large as the girl is a very big stamp and I wanted it to all be in proportion. This card ended up close to 5x7 in size, even after trimming it all down.

I added her up on pop dots


Ha-I think I used almost every E copic I own on this card-Sheesh!...that's a lot of browns! :) Now to put them all away...


Our Wonderful Sponsor for this challenge is:

Prize winner gets a $20 voucher!


Please pop in to view more inspiration from the PB team!

Debby,GretaHelenLorraineNat, Me!, and Sylvie


I love checking out all the current challenges if I have time-I have been trying hard to be better about joining in the fun! Don't forget to follow each Challenge Blog to show them some love too!


Thanks for stopping in to say Hello today!

 ♥ Sue


Pin It!

Thursday, October 4, 2012

Happy Birthday Barb!

Happy Birthday Barb!! 

 Just a little background here-it really is Barb's fault that I started stamping in the first place! She is a diehard stamper deluxe and brought a whole basket full of stamps to the first SU! meeting I attended. Honestly, I think she was looking for another group of stamp addicts so she wouldn't be so lonely-and probably so that her addiction did not look so bad....

Well...it worked! Thanks Barb for your wonderful inspiration and friendship!

I was tickled to find a brand new paper pad from Pebbles that I did not even remember buying...(again that should make Barb feel vindicated LOL!) Perfect for this Mo birthday image.  Even the little sentiment was from the paper pack!   I layered several of the papers and used a pretty rose/pink paper from SU! to mat it on. I also used a Silhouette file for the matting.

I am going to enter this in the
 DP2 challenge-Anything goes
 Copic Oz-Think Pink (be sure to check out this fundraising challenge!)
The Sisterhood of Crafters-Happy Birthday
Anything Goes Blog Challenge-Animals

Thanks for stopping by-see you Saturday!

card details:
===============================
Stamps: Mo's digital  Bella Carrying the Cake
Cardstock: Rose from SU! and Pebbles Sunny Side DP
Copics:
Ribbon-R 81,83,85
Dress-BG 72,75
Browns-E 31,33,34
Face-E00,11 R20
Shoes-C3,5
Ground-W 3,5
Misc: SU! retired ribbon, dimensionals
Silhouette file:8 piece square stamp set


Pin It!

Tuesday, April 3, 2012

What's On Your Workdesk Wednesday #148


Surprise!!!!  Yes, I am on vacation right now (hopefully enjoying the wonderful sunshine of Arizona) but I am pre-scheduling this post...I just had to show this sweet Mo Manning/Michelle Perkett  card I made.

****************
My poor desk left in transition.......... I had every intention of finishing up these Bugaboo Easter cards I started, but as the day before my trip progressed, I just did not get back upstairs to my crafty room. Guess they will be on hold for another year maybe.............

******

If you have been following my WOYW?Wednesday posts, you will have seen this sweet little boy image and these darling heart flowers hanging around my desk for ages...Really! I colored  Mo's  little boy Ben probably 2 years ago, and the heart flowers were a freebie from Michelle Perkett's site back in January I think. She has a freebie every Tuesday...great stuff! Neither got made into a card until just a few days ago...they landed together on my desk and I thought "Why not?" It's almost like they were meant for each other, don't you think?

The little boy so reminds me of my little grandson's, Cole and Lukey. I originally made this with Cole in mind...but having it sit around so long, it now really looks like little Lukey!

I used my Martha grass punch and some fun Bo Bunny double sided polka dot  ribbon I have been hoarding forever. I guess it is time to use it up!

I will be home this weekend and will check in with you all then! See you soon!


Pin It!

Tuesday, May 31, 2011

What's On Your Workdesk #104-They Grow Too Fast!


 What's On Your Workdesk Wednesday #104...the 2 year anniversary! Time got away from me this week and I did not get my WOYWW anniversary project completed darn it! I might just go ahead and finish it up and share next week. Those crazy crafters that join in each week have some big plans for the anniversary "party".

Since I didn't get my  project done I thought I would share a little detail from my workdesk instead.

I am going to show you my turn table and a peek inside ...my most used small supplies.


my cut up Neenah paper and  misc scissors

 My dimensionals and punches.

all my glues!

For long time followers, here is a current picture of the little loves of my life!
My precious little grandsons, Luke (age 1) and Cole (age 3). I had a great time spending Gwamma one on one time with the boys this weekend while thier Mama was gone and Daddy was busy working nights catching the bad guys.Got lots of good hugs and kisses from my little sweeties!

I whipped up this card to send to Cole, he was sad when Gwamma had to go back home yesterday, so I thought he would love to get some mail! He didn't know the story of Jack and the Beanstalk, so I guess I will have to look for that book for him. This Mo's Digital Pencil image so reminds me of  Cole-that full head of hair!!! I have another one I am working on for Luke. Luke will just tear it up (or slobber all over it LOL), so no need to get too fancy!

I used this sketch from Jen at I  love 2 stamp, just flipped.

If you get a chance, go check out the second anniversary What's On Your Workdesk Wednesday...!


Pin It!

Tuesday, March 22, 2011

What's On Your Workdesk #94

This is no day for "just a sliver!"

So What's On Your Workdesk Wednesday? Take a few minutes and visit some of my fave crafters!

Long time no see!  Sorry to have been absent all week, but hey, I have a great excuse! My little grandbabies, Cole and Lukey, have been visiting Gwamma and just left today. I would show you a picture, but I can not find my camera right now. Hate that when I do that! Took it upstairs to take pics of these cards and guess I set it down and it has become invisible. I finally got my son to take these pics so I could post tonight but forgot to have him take one of my messy desk. I will probably search for my darn carmera all night in my sleep LOL!.

I bought this darling Mo's Digital Pencil image last week and created these cards, using the same darling cooking paper from TPC Studio .Mo is donating all the proceeds from this digi to aid to Japan Hands On Tokyo and Global Giving. As of  March 15th she has raised over $500!  Spread the word about this thoughtful fundraiser.


I used a the Sweet Sketch Wednesday  but did not get it posted in time...oh well


This sketch is the Clearly Inspired Challenge #24.  Hmmm....maybe I can still make this challenge.

Card Details:

-----------------------------------

Stamps: Mo's Digital Pencil, Card #1 SU Birthday Bakery
Cardstock: Real Red, Garden Green, TCP Studio So Delish Everything byt the Kitchen Sink, Spice Pack
Ink: Copics
Misc: Nesties, SU word punch, Martha border punch, SU circle punch, SU satin ribbon, The twinery string, red and white  pearls.


Pin It!

Tuesday, March 1, 2011

What's On Your Workdesk? Wednesday #91


What do you snack on for treaties?

Yep, you are seeing what I picked to snack on tonight...little Hot Tamale candies! Discovered a long lost bag the other day, making me happier than can be!

Well, this is really my desk...after a quick card making session tonight so that I would have "sumthun" to show you besides my eternal mess!
Can you see me?  Yessiree, that's my shadow! I'm glad I took this picture...just found the stamp I have been looking for! I swear I am blind sometimes...and at the bottom of the picture you can also see a note to myself to MOVE  CAR...did I remember? nope....

BETTER GET BETTER

I made this card with another Help for Katie image by Mo's Digital Pencil.
I used the sketch from this week'The Sweet Stop SSS97  Decided I do not like the ribbon on this, so I think I will take it off or add some more buttons or something...just not doing it for me....I will have to think about it tonight. Maybe another set of buttons??? What do you think?

Pin It!

Wednesday, September 22, 2010

WOYWW? (almost Thursday!)


Okay, Okay...I have been going through WOYWW?  withdrawals (#68 this week). I haven't been stamping  much this last month, so there wasn't much "a happenin' "  on my stamping desk to show off. I have been trying to get back into the swing of things this week...and ended up with this little First Christmas ornament  made with a Mo's Digital Pencil image. This actually started out as a card for their Bright White challenge this week, but I could just not make the card thing work...no matter how much I twisted the elements around... and now I am happy it didn't work out.  Whew...brain strain. All the pretty do-dah's around this sweet image are made with the Fleur de lis nestability.


Above is the mess I have made this week trying to get back into the swing of things. I usually pick  up after each project, but not lately...YIKES it is starting to get deep. The other picture shows how I photographed this project. It was a little delicate to just lean against the back of the light box, so I took a glue dot and stuck it up so it would hang for the photograph. Ta-dahhh!


If you get a chance, hop on over and say Hello and join in the fun at Julia's Stamping Ground  What's on Your Workdesk Wednesday.

Pin It!

Saturday, September 11, 2010

Happy 30th Birthday Abby!

Today is my daughter Abby's 30th birthday! Seems just like yesterday she was born! Abby weighed only 5 lbs when she was born...a wee bit early, but she has stayed tiny all her life. She squeeeeaaks in at just below 4 foot 9 inches. By our state laws...she should still be in a childs booster seat LOL! She has been a little spitfire from the day she was born and never grew out of it LOL! Happy Birthday Sweetums!

Now on to this fun fold card! I totally copied if from a card that I actually stole borrowed from my oldest daughter  when "little" Luke was born. She knew I would have to give it a try...she said so when she showed it to me with a grin! Don't worry Lukey...Gwamma will give your card back now!

This is my first attempt at making this fun fold, so I tried to photograph as I went along. Here it is opened up!

Here is what you will need: I piece of each size

Cardstock
5 x 12
5 x 6 (I used double sided dp to photograph for you)
3/4 x 6 cream strip
glue dots


Score this piece at 2.5 and 5 inches
fold over at the 5 inch score and measure 1.5 inches up. Cut not quite 3/4's of an inch

Inside of card
open up the card. Measure down 1/2 inch and make a small mark. Score from this mark back up to the ends of each cut. I marked it  on this sample so you can see.

Outside of card
 After you score the triangle, fold it over again and push the triangle to the inside.


 These two pictures are of the strip of paper that actually will swing your image. This piece is cut originally at 3/4 inch and then you will do a little fine tuning and cut off a little off towards the top. See pic to see what I mean. Mark 1 inch up on the bottom left side and then cut at an angle to make a point. Fold up the point and add a glue dot here. Make sure it does not hang off the point...you might have to fold over your dot like I did. It will be inserted with the little point folded up like this. Set this aside for now.

Take the 5 x 6 piece of paper and score at 3/4 , 4 3/4 and 5 1/2.

Left side: Measure up 2 inches from the bottom and cut out the section from the score. Measure down 1/2 inch from the top and cut out that section.

Right side: Measure one inch up-- and cut over to the second score line and cut out that section.

Add a circle to give you the shape...picture below is this is how I got the circle...pretty high tech...yep that's me..Miss Techie.. (don't roll your eyes Abby LOL)

A nice high tech salad plate gave me the curve I needed.

Flip over your 5 x 6 cut up piece. Glue it on like this, aligning your top and bottom edges.


There it is...glued on! Stick in the swing arm and line it up straight with the score line. Push real hard so the glue dot sticks. It can get a little weary after you open and close this baby 100 times LOL!


I did a little testing here to make sure the swing arm was working here before I glued down the right hand tab.
Glue the tab down and test  out ther placement of your image on the swing arm. (you will glue the two front folded panels together once you are sure the swing arm works properly)
Just another peek here of what it will look like before the final tab is glued down.

See how I have part of my image hanging over the front of the polka dot piece? That helps "lock" in the image so it does not flop around. This little puppy is stabilizing the girl that will be popping  up when you open the card.  I adhered my image with glue dots (add glue dots towards the end of the swing arm) and add your image. Open and close your card (at least one hundred times....just kidding!) and test to make sure your image clears the half circle nicely and opens smoothly. This is a good time to go back and glue your front fold together.

Now you are ready to decorate as you wish. I cut out the sentiment with my Cricut and used a fun Mo's Digital Pencil digi. I think this one was a freebie when you joined Mo's group on  Paper Craft Planet...trying to remember......


The Birthday girl holding nephew 'lil' Lukey! (she is 30 and he is 6 months)

I am going to enter this card in the in the Fun Folds challenge over at Our Creative Corner.

Thanks for sticking through this...if you make one of these...I would love it if you link it here so I can come take a peek!

Whew...

Pin It!

Thursday, July 1, 2010

Mo's Matchbook Mini Album

Where in the world have a been you ask? Wellllllll.....I have had the most wonderful visit from my oldest daughter and my two grandsons. What a treat to visit almost all week with them! Cole and I had a slumber party every night ( a test to see if he was ready  and able to stay all night  without Mom nearby---he passed the test with flying colors!) I took Cole to his first movie (Toy Story 3) and he had a great time as well. Been a great week for sure.

Okay...here as promised...simple instructions on how to make this fast and easy matchbook  mini!

I made this little boy mini album for Erin's hubby Matt and the girl mini album below for their friends Todd and Amber.

Both Matt and Todd have decided this year to make a career change into law enforcement and both are currently attending the state police academy. I thought the Mom's would have fun filling these little books full of family  photos and giving them to the "new recruits". A small touch of home to have nearby. I included some stamped  Ali Edwards journaling images,  and a sampling of patriotic ribbons and nestie stars with the kid's names on them to decorate the inside pages. I hope the Mom's will  have some fun scrapping these little mini's.

I stumbled on this cute mini album on a site called Stampin Addicts and a post by Beedubya back in February 2010.

I used some cuttlebug folders for texture as well as my cricut/scal program for the word DAD.(still figuring that out LOL)


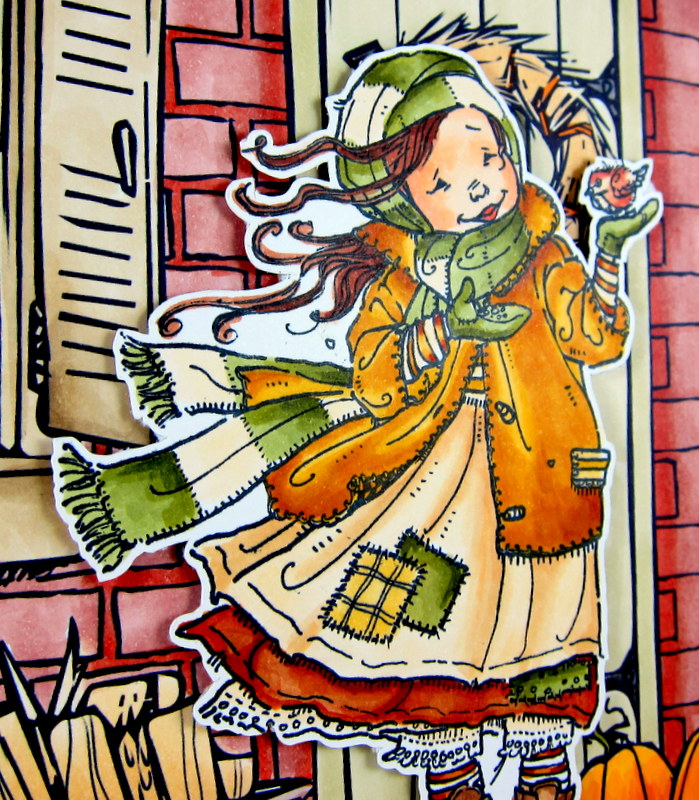
I think this looks like Todd and Amber's daughter Maylee!


Mini Album Details:

------------------------------------------------

Stamps: Mo's Digital Pencil Too images,  Support the Troops
Cardstock: SU! Navy and Red, SU red striped DP,blue star DP by Paper Pizazz
Ink: Memento Black and Copics
Misc: ribbon from Michaels, Star nesties, Star and dot Cuttlebug folders, Cricut/scal for the word Dad


Here are the pieces you will need to make this mini album. If you enlarge, you can see the score lines or read below.
 
Pages: 3 x 4 1/2 inches---6 pieces of cardstock for the pages (scored at 3/4 inches and you could round the corners on the other end if you choose)

Front Cover: 3 1/4 x 10 inches---score at 4 1/4, 4 1/2, and 9 1/4

Pictures: 8 to 10 pictures sized/cropped  at 3 3/4 x 2/3/4 or smaller(depends on how much journaling you want to add. This mini  makes a book with 12 pages.) See photo size suggestion below as well.

DP:  cut at 2 3/4 x 3 3/4 if you want to decorate any pages and then add journaling like I did in the turtle mini in the pictures below. If you want to add pictures over the DP cut the pictures to 3 1/2 by 2 1/2.

Fold the cover at the score lines and it should resemble a large matchbook.Insert the pages under the 3/4 inch end of the front cover and staple. Now...you will need a heavy duty stapler for this (I used a heavy duty office one at work) OR you could punch holes through the cover and pages  and tie with a ribbon. Make sure you don't do what I did in the pic below. Try to staple closer to the end of the album so that you leave room to tuck in the front cover. This was a little too high up for my liking...I forgot already from the first mini like this I made! Drats!!!  I did add a couple glue dots to the front and back of the "spine" and added ribbon tied around the spine  for decoration., or add a strip of DP.

Don't staple too far in from the edge (like I did here) , you need to be able to tuck in the front flap. (Do as I say, not as I do in this case LOL)

This is what it will look like when you have stapled in the pages and added the ribbon. I added fun DP to these on a few pages  just because they were unfinished gifts, but this should really be pictures.


Below is a picture of my Gwamma's Boys mini that I carry in my purse. If you have a clear envelope it will protect your album-- but really I made this simple so I could carry it without any fuss---and show off my baby boys! I made this back in April and it is still holding up well!  I think the cute turtle DP is made by 3 Bugs in a Rug, but I used it all, so no way of knowing for sure!

Here is the mini I made for me and below are the pages. You can see a larger version by clicking on each picture below.

My daughter Erin with newborn Luke and Cole when Luke was just hours old.
 
Cole holding his baby brudder for the first time. I love the Ali Edwards Technique Tuesday journal stamps.

Erin with Luke as a newborn...love this pic...Now at 4 and a half months--Luke only has eyes for his Mama!
Two brothers taking a nap at home.

Luke napping during his first visit to my house back in March. I love how babies sleep with their hands up in the air like that!

Cole and this Gwamma love to put puzzles together...here he is with a fave truck puzzle..Thanks Auntie Linda! 100% Boy is from a boy stamp set at Michaels.

An early morning game of match box cars with Mommy! The last page!


Hope you find time to make a little mini like this, they are so much fun! Thanks for stopping by and if you are reading this...thanks for sticking clear to the end LOL!

Pin It!
Related Posts Plugin for WordPress, Blogger...